In this post we’ll talk briefly about using your F5 Load Balancer to do SSL Offloading. Your F5 will be the termination point for all SSL Traffic so it can decrypt that traffic giving you more visibility into your incoming traffic. This is what we are after. From that point you can start using your WAF to make intelligent security decisions because now it can see the traffic.
Below are some benefits using your F5 for SSL Offloading:
Security Patches – If an SSL/TLS vulnerability comes out, you only need to apply the patches to the F5, not the Servers sitting behind the F5
Certificates – You only need to purchase certs for your F5 Virtual Servers and not the Servers sitting behind the F5
Routing Options – since you are decrypting traffic, you can now use things like the headers or URI to make routing decisions.
Improved Performance – because you are offloading the SSL/TLS processing (decryption) to the F5, your servers are now relieved of these CPU Intensive processes. So now your servers can do what they are meant to do, deliver content.
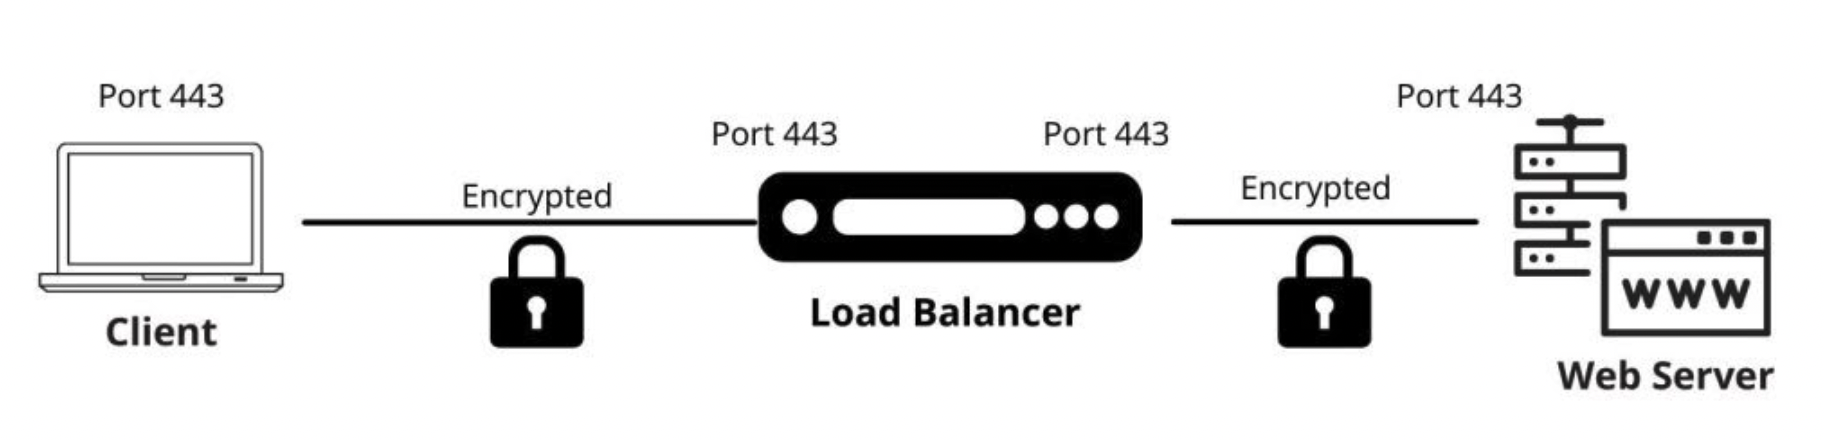
Now let’s look at a diagram.

You will see users initiates an SSL/HTTPS connection from the outside. The F5 terminates this traffic, and offloads it or decrypts it. It now has full visibility into the traffic. But the regular web traffic is passed along to one of the servers in the pool unencrypted via HTTP.
1. Add SSL Certificates
The first thing you want to do is add the SSL Certificates to get the SSL termination setup. You’ll want to get these certs from whoever you purchase your public SSL certs like Network Solutions, GoDaddy, Verisign, LetsEncrypt, etc…
You will want to import both the .KEY and .CRT files here:
System > Certificate Management > Traffic Certificate Management > SSL Certificate List > Import…

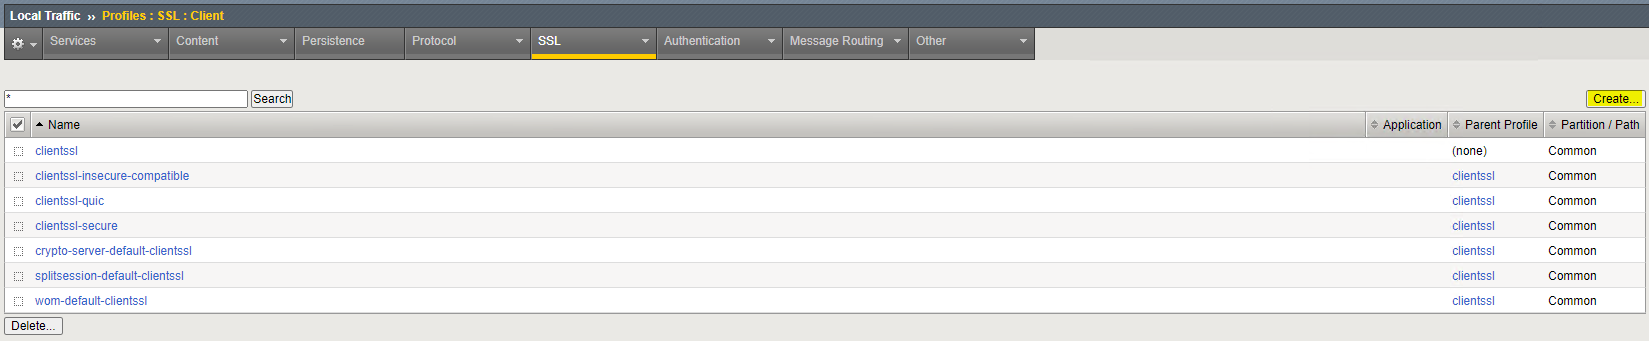
2. Build SSL CLIENT Profile
Here you will build out your Client SSL Profile which will get applied to the HTTPS Virtual Server.
Local Traffic > Profiles > SSL
Important: make sure you click “Custom” to give you the “Certificate Key Chain” option.
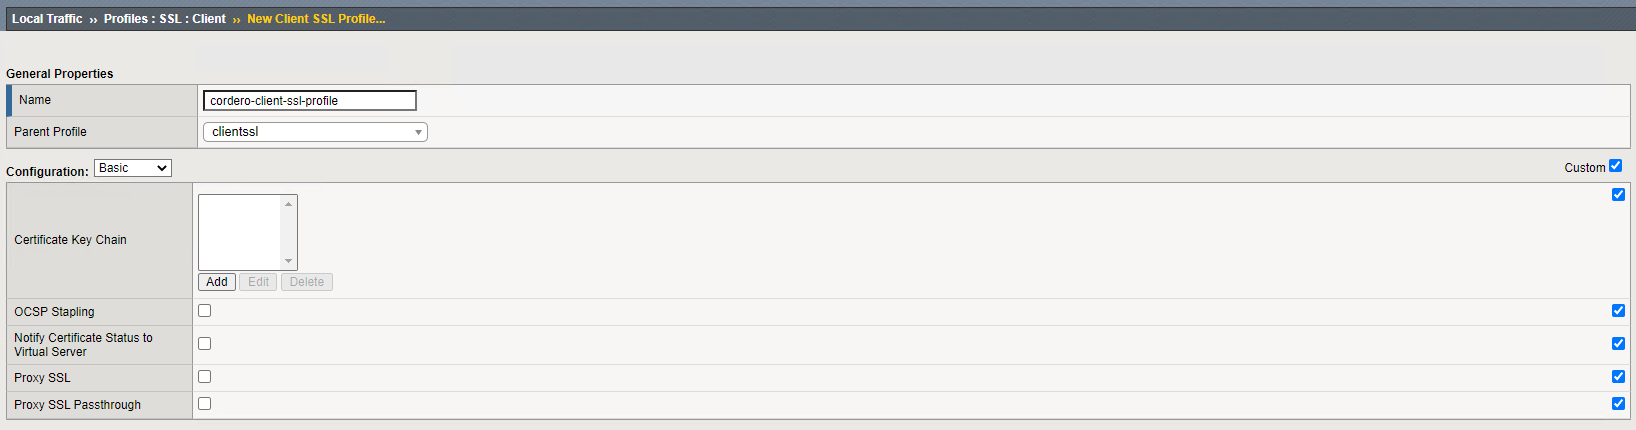
When you click “add“, you’ll get a prompt like the one below. Make sure you choose the .KEY and .CRT from step one.

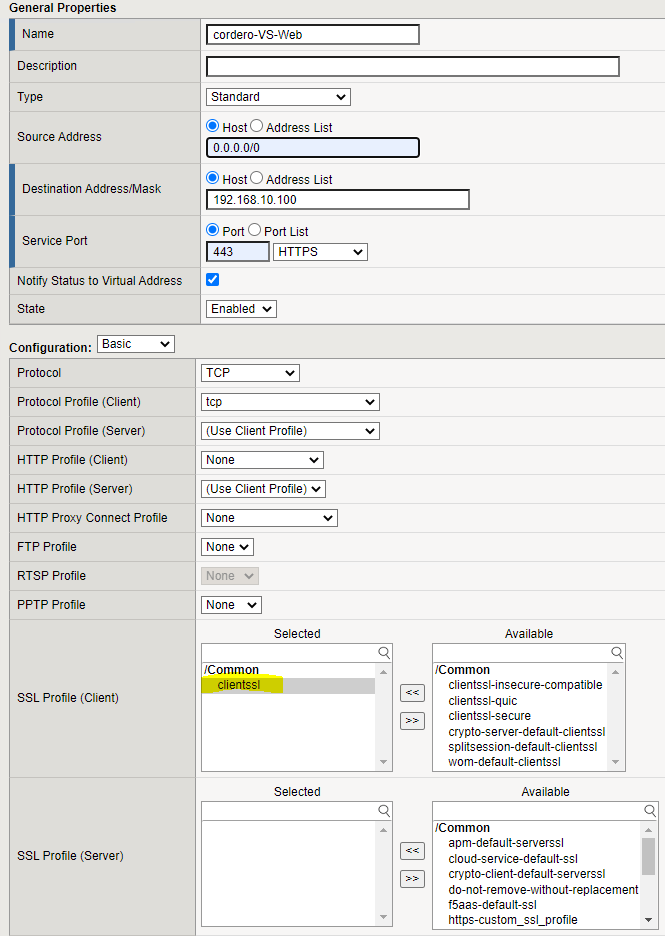
3. Virtual Server Setup
You’re now going to add the SSL Profile to the Virtual Server of your choice. Since we are working with “SSL Profile (Client)“, you do not put anything into “SSL Profile (Server)“.
Below shows clientssl but you want the profile you created above in step 2.
Local Traffic > Virtual Servers > Virtual Server List > {virtual server name}
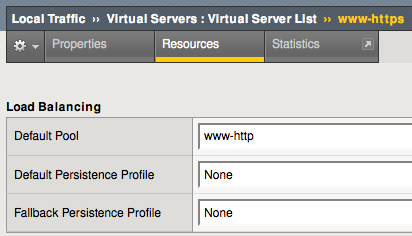
This is important. You should have two Virtual Servers, one for HTTP and one for HTTPS. We are working on the HTTPS profile. Make sure you choose your HTTP version for the “Default Pool“, not the HTTPS version which is what you would normally do.
This is where the HTTPS to HTTP traffic flow happens. You don’t want to do HTTPS back to the servers.
4. Identify HTTPS Traffic
One issue you might run into is that the servers will be expecting HTTPS traffic and not HTTP Traffic. You’ll probably have your web servers setup to redirect HTTP>HTTPS. A way around this is to tell the servers that the traffic is legit and the F5 SSL Offloaded this traffic.
We will use X-Forwarded-Proto where SSL load balancer will be inserting the X-FORWARDED-PROTO header. You will need to work with your dev team to get the web.config or PHP files configured for this.
To do this, you will want to create an iRule like this:
# Notify the backend servers that this traffic was SSL offloaded by the F5.

when HTTP_REQUEST {
  HTTP::header insert "X-Forwarded-Proto" "https";
}
Create your iRule here:
Local Traffic > iRules > iRules List

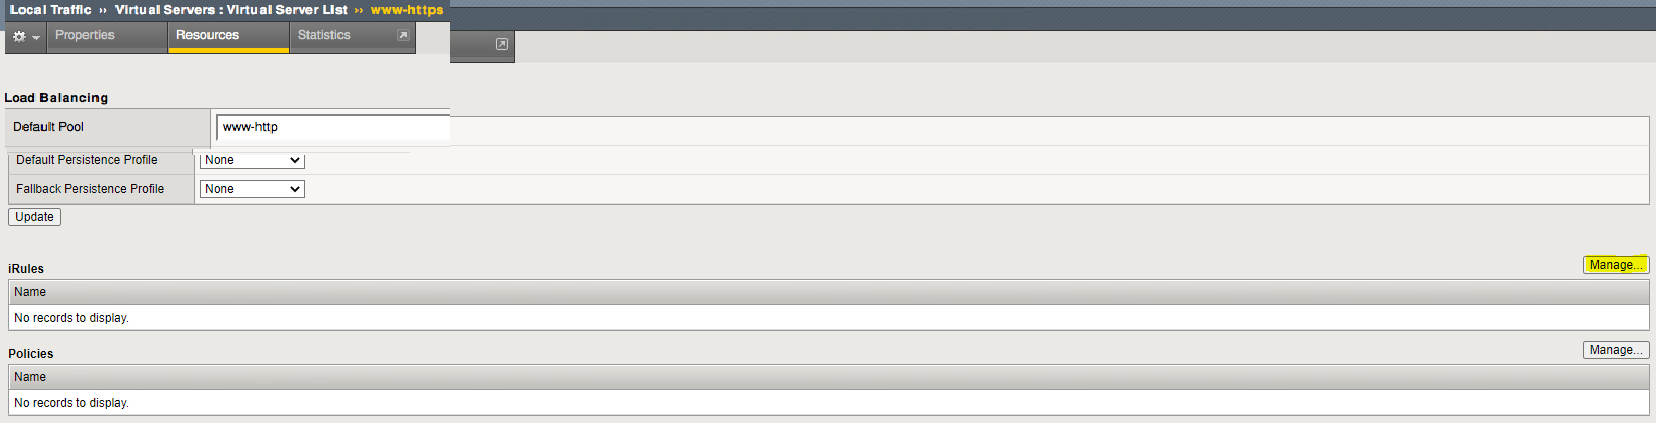
Now you want to apply this iRule to your HTTPS Virtual Server:
Local Traffic > Virtual Servers > Virtual Server List > {virtual server name}
You’ll want to click on “Mange…” under “iRules”
Like I mentioned above, you will need to get with your dev team to make code changes. Below are some examples for both web.confg and PHP:
WEB.CONFIG Example: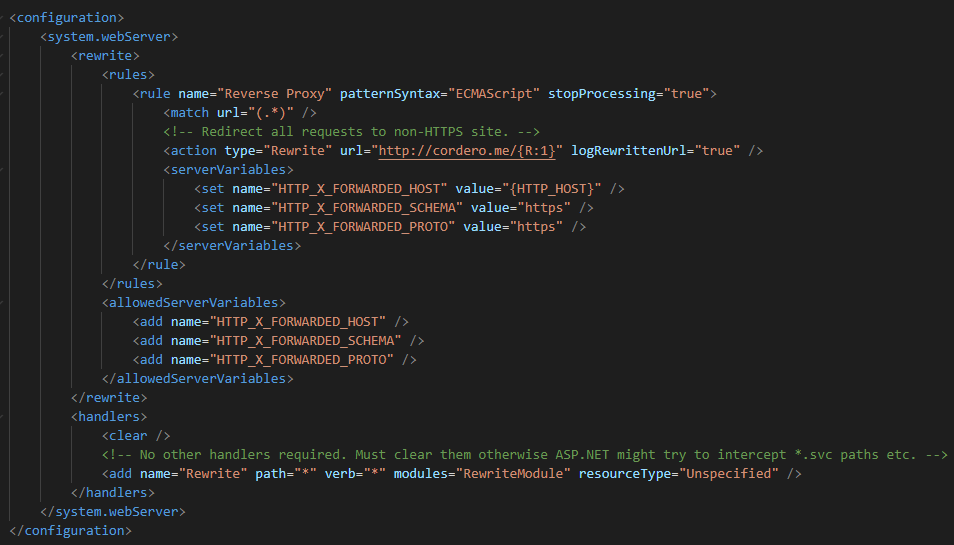
PHP Example:
 $HTTPSEnabled = (isset($_SERVER['HTTP_X_FORWARDED_PROTO'])) ?
        strtolower($_SERVER['HTTP_X_FORWARDED_PROTO']) == "https":
        strtolower($_SERVER['HTTPS']) == "on";